Friday, May 28, 2010

Quick Meal Friday: Miso Gyoza Soup


My kids love miso soup. I occasionally use a mix to whip some up, but I hear complaints that it's too salty (and to save yourself a missed heartbeat, just don't look at the sodium count on the label). I use a not-authentic-miso recipe from an old standby collectionMoosewood Restaurant Cooks at Home: Fast and Easy Recipes for Any Day.

Instead of making a special trip to the Japanese grocer for kombu to prepare dashi, I use dried shiitake mushrooms, which you usually can find in any grocery store. Steeping the mushrooms in very hot water adds an earthy flavor to the broth that later gets rounded out by a swirl of miso paste. (By the way, you can buy miso paste at nearly any old grocery store. Unless you eat it regularly, you won't notice much difference among brands.)


I round out the whole soup with more veggies, whatever I have in the fridge (could this be my mantra?). I particularly love carrots and baby bok choy, which is always available at my Trader Joe's and has a far less bitter taste than full grown bok choy, as long as you avoid the very white parts of the stalk. I also add a bag of cooked vegetable gyoza from Trader Joe's, from the freezer section. The Thai shrimp gyoza are great too, but I have a little one with a seafood phobia. I empathize; I didn't eat a piece of seafood until I was 21, a memorable seafood linguine dish at the Legal Seafoods chain in Boston.


When you do your final ladling to serve this dinner, it's easy to leave out any offending ingredients your kids won't eat, as long as you chop things largely enough. And don't you find that those offending ingredients are never the same for each kid anyway?

Miso Gyoza Soup
Serves 4 to 6.

4 dried shiitake mushrooms
1 1/2 cups boiling water
2 quarts vegetable broth
3 carrots, peeled and sliced
one package frozen vegetable gyoza, prepared according to package directions (if you use Trader Joe's pan instructions, however, I recommend that you lower the heat!)
2 to 3 heads baby bok choy, sliced
3 tablespoons white or red miso paste
one block extra-firm tofu, pressed between paper towels to absorb excess water and cubed

In a glass measuring cup, pour boiling water over mushrooms and let sit for 10 minutes. Meanwhile bring broth to boil in a soup pot. Add carrots and lower heat to simmer; cook for about 10 minutes. Remove mushrooms from cup and pour steeping water into the pot. When cool enough to touch, trim off stems and slice mushroom caps. Add mushrooms to the pot with the bok choy. Cook about 5 minutes.

With a glass measuring cup, scoop about 1/2 cup of broth from the pot, without vegetables if possible. Stir in miso paste and mix until well combined. Turn off heat, and pour in miso mixture. Ladle broth and veggies into bowls, then add tofu cubes and gyoza.

FYI, if you store the tofu cubes and gyoza separately, you can save the leftovers for the next day's lunch. Otherwise both will turn into a lacy mush within a couple hours.

{Follow-up: Here's a link to another mom's similar adventure in miso soup!}

Monday, May 24, 2010

In Search of the Perfect Pizza Crust, Part 2


Before I dip into my whole grain pizza crust excursion, let me tell you that I tried another all-white crust. This is the Olive Oil Dough from Artisan Bread in Five Minutes a Day: The Discovery That Revolutionizes Home Baking. What a delicious Pizza Margherita.

In line with the goals of this cookbook, the Olive Oil Dough is such a simple recipe, far quicker to pull off than my all-time favorite recipe from Williams-Sonoma, which requires a lot of hands-on time. This would make a weekly Friday night pizza quite doable even for a family with many munchkins, like ours (barring a Friday night TBall game or other obligations of course). But, sadly, we lost a dear friend in our bread baking using this high-heat recipe. This one doesn't work so well without a stone, and we haven't been able to make this again.


Moving on with the "search" in my post title. In my goody-two-shoes effort to integrate more whole grains in our diet, I'm looking for the perfect crust that includes whole grains. Note that I do not require this to be a 100% whole grain crust. I realize that the textural issues I'll get to below may be ameliorated by the addition of some good old plain white flour.

My first try was a recipe from The Art of Simple Food: Notes, Lessons, and Recipes from a Delicious Revolution. This one includes rye flour, which gave the dough a slightly grainier feel and the cooked pizza a much nuttier taste. Below we made a plain cheese and a cheese and tomato. Both were delicious, but the dough, as the kids pointed out, tasted "like bread." Indeed, this was very puffy, much more of a rise than I prefer in a pizza crust. But maybe I'm asking too much from this recipe, which really is quite delicious if not exactly what a child expects on pizza night.


As anyone who bakes with yeast may agree, handling the dough is one of the most luxurious sensory experiences. Some girls need a massage and a hot tub soak. I'll take kneading dough over that any day. (Minus the temporary carpal tunnel-like sensation you often have afterward.) Alice Waters' dough was fabulous in the hands! Just look at the photo below. Truly like baby skin. And I get my fair share of baby skin...


So, still moving on, and looking for something less puffy. I used the Friday Night Pizza recipe from Animal, Vegetable, Miracle: A Year of Food Life (P.S.). This uses roughly half whole wheat and half white flour and made a delicious crust, again with the nutty and more crumbly texture expected from whole grains. The kids devoured this and noted that it was definitely not as puffy as our previous experiment. Among those kiddos that have the power of speech in this house, it was agreed that this is not a "favorite" crust, probably yearning for the days when mom was satisfied with just one attempt at pizza crust which would have left them with a lovely thin white crust. But, hey, mom has three kids now and a new career that involves eating, cooking, shopping for food, and writing recipes. These are the breaks.


Rounding things off with some steamed green beans. This lovely colorful finger food is actually sweet if you cook them within a couple days of purchase and don't nuke them to a mushy tasteless death. Bring a small pot of water to a boil, add a large pinch of salt and the beans (you can also add the beans in a steamer basket - I know that preserves nutrients but it also gives me another dish to wash), and boil for 3 to 4 minutes. You'll have to take one out and taste it to know if they're ready to drain. While the beans are in the pot, prepare a small bowl of ice water. Then you'll be ready to pull those beans out with a slotted spoon or quickly dump them in a colander and then get them in the ice water. I top them with a small sprinkle of kosher salt after draining them from the ice water.


I also made my favorite pizza, a margherita with cheese, tomato, and basil. I prefer slices of mozzarella from the hunk you can buy floating in a little cheese water bath, but the kids think that's "weird." So compromises are made.


Here's the recipe, which I followed without tweaking, straight from the Animal, Vegetable, Miracle website.

Do you have a favorite pizza crust recipe? Let me know in the comments, and I'll give it a try.

Friday, May 21, 2010

Quick Meal Friday: Shrimp & Veggie Curry


I'll be back with more on all the goodness found in this book:


But for now I'll share a delicious dinner from this informative resource. If you need to cut costs and the grocery bill is the next item on the chopping block, check out this book!

Shrimp and Veggie Curry
(adapted from Family Feasts for $75 a Week)
Serves 4.

2 tablespoons olive oil
1 large onion, peeled and finely chopped
2 carrots, thinly sliced
2 potatoes, scrubbed and cut into 1-inch cubes
2 1/2 cups chicken broth
2 cloves garlic, minced
2 teaspoons curry powder
1 cup uncooked long-grain white rice
1/2 teaspoon black pepper
1 pound medium-sized shrimp, peeled and deveined
1/4 cup chopped fresh cilantro

Heat oil in a large skillet over medium heat. Add onion, carrots, and potatoes, until they start to soften, 6 to 8 minutes. If vegetables begin to stick, add a little slosh of chicken broth to the skillet.

Add garlic and curry powder; cook, stirring until fragrant, about 2 minutes. Add rice, broth, and pepper. Bring to a boil. Reduce heat to medium-low; cover and simmer for 15 minutes.

Add shrimp; stir, cover, and cook, stirring occasionally until shrimp are opaque and rice is tender, another 5 to 7 minutes. Sprinkle with cilantro to serve.

Wednesday, May 19, 2010

Nicoise Dinner


This is not quite a "quick" meal. There will be preparations involved. Boiling some eggs, prepping veggies, mixing up a vinaigrette, and - brace yourself - cracking open a couple cans of tuna or salmon. Easy stuff. All the ahead-of-time steps can be done the day before. Or even a couple days ahead. Little challenge with beautiful results. I call this a nicoise dinner: Turn it into a salad, stuff it in a pita pocket, or lay the vegetables and fish on a platter and let your kids make their own plates. Lots of freedom here.


I love using Ina Garten's potato techniques. In this case, a splash of chicken broth (or veggie broth) on the warm, cooked potatoes makes a delicious difference.


Nicoise Dinner
Serves 2 to 4.

4 large eggs
1 1/2 pounds golden potatoes (about 5 medium), washed and cut into 1-inch cubes
8 ounces green beans, trimmed and cut into 1 1/2-inch slices
2 tablespoons chicken broth (or vegetable)
1 1/2 tablespoons white wine vinegar
1/4 teaspoon Dijon mustard
kosher salt and freshly ground black pepper
5 tablespoons olive oil
2 tomatoes, cut into wedges
2 small cans of tuna or salmon
one 15-ounce can of olives
handful of greens, washed (optional)

Place the eggs in a medium-sized saucepan and fill with water to cover eggs by an inch. Set the pot to boil over high heat. Once the water reaches a boil, turn off the heat leaving the pot on the hot burner and cover. Let eggs cook in the hot water for 11 minutes. Using a slotted spoon, immediately transfer eggs to a bowl of ice water.

Meanwhile, boil water in a large saucepan. Once boiling, salt the water and add potatoes. Lower the heat to a gentle boil and cook for 12 to 15 minutes. Add green beans to the potato pot and continue to gently boil for 4 minutes. Drain potatoes and beans. Place in a bowl and toss with chicken broth. Let potatoes and beans sit for a few minutes to absorb the broth.

Meanwhile, combine vinegar, mustard, and salt and pepper to taste in a jar. Seal the jar and shake. Pour in oil, seal, and shake again to emulsify. Add salt and pepper as necessary.

Refrigerate the eggs, potatoes, beans, and vinaigrette if using later. Otherwise, toss everything together in a bowl and serve as a tossed salad. Alternatively, serve items separately on a platter for make-your-own salads or pita pocket fillings.

Monday, May 17, 2010

Zucchini Walnut Muffins


Recently I was asked to give some motherhood advice to my daughter's pregnant teacher. Among a few other thoughts, I mentioned that having a simple and quick muffin recipe was a sanity saver for me. I've really lost my taste for most processed foods, but with a young infant - or, frankly, with kids of any age - you really have to have some grab-and-go options unless you're willing to go hungry. That's not my game; I enjoy the delights of food far too much to go hungry!


My go-to muffin recipe is an all-around winner from a 1994 cookbook that I use at least weekly: Moosewood Restaurant Cooks at Home: Fast and Easy Recipes for Any Day. A recipe titled "Muffin Madness" provides a basic set of wet and dry ingredients, followed by four different flavor combinations. Zucchini walnut muffins are a favorite in our house. Seriously, these are so delicious I never even had a chance to take a photo of a baked one! Give this a whirl. Then treat yourself to a lifetime of great quick recipes and pick up the book.


Zucchini Walnut Muffins
(adapted from Moosewood Restaurant Cooks at Home: Fast and Easy Recipes for Any Day)
Makes 12.

2 large eggs
1/2 cup canola oil
scant 1 cup brown sugar
1/2 teaspoon vanilla extract
2 cups grated zucchini (about 2 small or 1 large zucchini)
2 cups white whole wheat flour
1 teaspoon baking powder
1/2 teaspoon salt
1 teaspoon cinnamon
1/2 teaspoon cardamom
3/4 cup chopped walnuts

Preheat oven to 350F. In a large bowl, mix together the eggs, oil, brown sugar, and vanilla;  stir in zucchini. In a separate bowl, whisk together the flour, baking powder, salt, cinnamon, and cardamom. Gently stir the dry ingredients into the wet mixture until just combined, being careful not to overmix the batter. Fold in walnuts.

Spoon or scoop the batter into an oiled muffin tin, and bake for 20 to 25 minutes, until puffed and golden. (Reduce the baking to 10 to 15 minutes for mini-muffin tins.) A toothpick inserted in the center should come out clean.

Friday, May 14, 2010

Quick Meal Friday: Fish Pita Pockets


This is a refreshing take on the old make-your-own taco night than I'm sure many of us had as kids. Remember opening the box of El Paso hard corn tortillas? The sheer delight of choosing your own fillings? Hmm... were yours like the ones I recall? Ground beef sauteed in a seasoning packet? Shredded cheddar or American cheese? Shredded iceberg lettuce? Jarred salsa? Possibly tomatoes?

{BTW, Trader Joes attempted a little comeback on this classic family dinner, selling its own boxed pre-formed tortilla shells and a meat seasoning packet (incidentally we found the seasoning to be far too spicy for our wimpy taste buds). Just in case you need to revisit your past...}


Here we made our own lightly battered, fried fish fillet slices, and served these with baby spinach, sliced purple cabbage, and a yogurt sauce in homemade pita pockets. I'll get to those in a future post. Go ahead, buy your own pita and you could get this on the table in under 30 minutes.


Fish Pita Pockets
Serves 4.

one pound whitefish fillets (we used frozen tilapia)
1/2 cup panko crumbs
2 tablespoons all-purpose flour
Kosher salt and ground pepper
2 eggs
1/4 head of purple cabbage
4 ounces baby spinach leaves
8 ounces nonfat Greek yogurt
zest and juice of one lemon
2 tablespoons chopped Italian parsley or cilantro or dill
1/4 cup canola oil, plus extra as needed for frying

Pat dry fish fillets with paper towels and slice crosswise into one-inch-wide strips. Combine panko, flour, 1/2 teaspoon salt and 1/4 teaspoon pepper in a shallow dish, such as a pie plate. In a second shallow dish, whisk eggs gently. Slice the cabbage and place in serving dish. Rinse spinach and place in serving dish. Gently whisk together yogurt, lemon juice, lemon zest, herbs and salt and pepper in a third dish.

Heat 2 tablespoons oil in a nonstick skillet over medium-high heat until shimmering. Check temperature by flicking water from your hands into the pan; when the bubbles jump, the pan is ready. Dip fish strips into egg dish and then into panko mixture, shaking off extra. Turn heat down to medium, and gently lay fish into pan ensuring that each piece has space surrounding it. Fry gently until underside is browned, about 2 minutes per side, turning down heat if needed to prevent browning too quickly. Flip and brown other side, about 2 minutes. Place fish in another dish and serve with vegetables, yogurt sauce, and pita pockets.

Monday, May 10, 2010

Garden

Hope you all had a wonderful Mother's Day!


There are a few things in the kitchen garden these days. A bowl of lemons.


From this tree, which gives us fruit all year long since I learned how to prune it and feed it a couple years ago.


A pot of herbs in the kitchen window, basil and Italian parsley for now.


And a pot of mint that just had a big haircut.


Outside is looking surprisingly lovely. Rosemary spreading under the kitchen window.

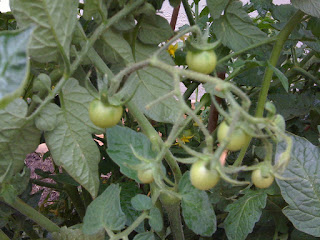
A while back I showed an unintentional peek of our naked garden boxes. Since then we had decided to pass on another vegetable gardening season while focusing on other things, like saving money by not buying starter plants. So what a fortunate surprise to find a cherry tomato from two years ago decided to return.


With probably 4-6 inches of new growth per day.


And plenty of tomatoes swelling like little green balloons.

I would have been so thrilled to just have a ton of cherry tomatoes, knowing my kiddos will pop these in their mouths all summer like they were jelly beans.


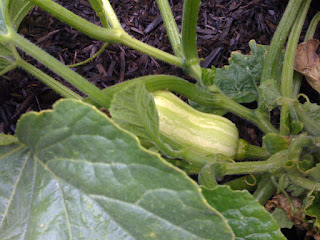
I recently discovered a butternut squash who wanted another hurrah.


And a roma tomato plant.


And even a pumpkin!

Have you been in the garden lately?

Friday, May 7, 2010

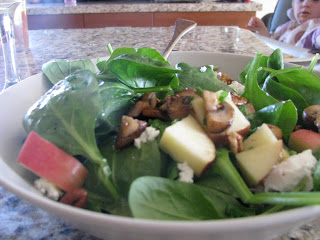
Quick Meal Friday: Spinach and Mushroom Salad


I owe you readers a good one here, having missed a few Fridays now. Seems our smallest munchkin (slight view in back of photo) may have one of those communicable diseases we aren't supposed to get anymore...

But this is a goodie. And very quick. Kudos to you if you could get your kids to eat it too. Not so in my house.

Spinach and Mushroom Salad
Serves 2.

2 teaspoons plus 5 tablespoons extra-virgin olive oil
4 ounces cremini mushrooms
Kosher salt and freshly ground black pepper
splash of white wine
1/3 cup chopped pecans
1 1/2 tablespoons white wine vinegar
1/4 teaspoon Dijon mustard
4 ounces baby spinach
one sweet apple, such as gala or honeycrisp, chopped
1/2 ounce goat cheese

Clean mushrooms with a damp paper towel. Halve or quarter mushrooms, depending on size. Heat 2 teaspoons olive oil in a small nonstick skillet over medium heat. When oil is shimmering, add mushrooms, with salt and pepper to taste, and saute, stirring occasionally, about 4 to 5 minutes, until mushrooms shrink and have a strong, earthy aroma. Turn heat to medium-high; add a splash of white wine to skillet, stirring constantly, until wine has evaporated. Lower heat to medium; add pecans and stir to lightly toast, about 2 minutes. Remove pan from heat.

Meanwhile, combine vinegar, mustard, and salt and pepper to taste in a small lidded jar. Shake to combine. Add 5 tablespoons olive oil and shake vigorously. Set aside.

Divide spinach between two bowls. Top each with half of warm mushroom-pecan mixture. Divide apple and goat cheese among bowls and drizzle with dressing after giving the jar a quick shake.

Wednesday, May 5, 2010

Chocolate Hazelnut Brownies


Crazy good. So good that I just left the computer to eat the last one. I'm not even that nuts about chocolate! I found these brownies in Sunset magazine this month. Love love love Sunset. It's homemaking and beyond. And it shows me gardens I could actually have - were budget not an issue - because no matter how much I like hostas or cherry trees they aren't growing in my desert backyard. If you live in the Southwest and have an itch to travel soon, pick up this issue.


My sous-chef was available for this one. (I'm noticing a recurring theme with the kids turning up to help when treats are involved.) We used almost three individually-wrapped dark chocolate bars from Trader Joe's 100-calorie package. And the Scharffen Berger cocoa I've been saving for something special. Really, I can't think of a more decadent way to get your antioxidants. Take it from my boy: "Chocolate is good for your heart, Mom."

This couldn't be easier. We made the whole thing in a 4-cup glass measuring cup. I highly recommend eating one warm with a scoop of vanilla ice cream and some sliced strawberries.

Chocolate Hazelnut Brownies
tweaked from Sunset, May 2010
Makes 8 large brownies.

1/2 cup butter
1 1/2 ounces dark chocolate, broken into pieces
3/4 cup plus 3 tablespoons sugar
1/4 cup unsweetened cocoa powder
2 large eggs
1 teaspoon vanilla
1/2 teaspoon Kosher salt
3/4 cup flour
1/2 cup Nutella (to be scraped in by tablespoonfuls)

Preheat oven to 350F. Line or spray 8 muffin cups. Microwave butter in a heatproof bowl or measuring cup to melt. Add chocolate pieces, stirring until melted. Add sugar and cocoa and stir to blend. Whisk in eggs, vanilla and salt. Add flour and stir until smooth. Spoon batter evenly into muffin cups. Drop tablespoon of Nutella into center of each brownie, pressing down slightly. Bake until a toothpick inserted into brownie (not Nutella) comes out with just a few moist crumbs, 20-28 minutes (28 in my oven). Let pan cool on a rack about 10 minutes before eating.

Monday, May 3, 2010

Tortilla Verde


Spanish tortilla. Dinner of champions in our house. This is one of those remarkable dinners that everyone will eat, without individual tweaking. And notice that green stuff? Baby spinach. Yes, all three munchkins eat that too. And they can even see it! I made this last spring for a St. Patrick's Day tortilla, a comical union of my diluted Irish heritage and my hubby's strong Spanish blood.


I've used probably 25 different tortilla recipes over the years. And I've had several hands-on lessons with Spanish friends, both in their kitchens in Spain and in mine where we were limited to my ingredients and kitchenware. The all-out winner was a recipe from Cook's Illustrated last summer, which I've tweaked and doctored and fine-tuned to our family tastes.